
How to Make Your Own Canvas: Stretching, Sizing, and Priming
Making your own canvas might sound tricky and intimidating, but, in reality, it’s a deeply rewarding process that allows you to customise your canvas to suit your artistic needs. What’s more, it can save you a lot of money without sacrificing the quality, especially if you’re working with professional-quality linen canvases or creating large paintings.
In this article, I’ll share my process of making a canvas from scratch and walk you through every step of the process, from assembling the stretcher frame and stretching the canvas to sizing and priming it. I’ll also compare different materials, methods, and tools so you can decide what works best for your artistic practice.
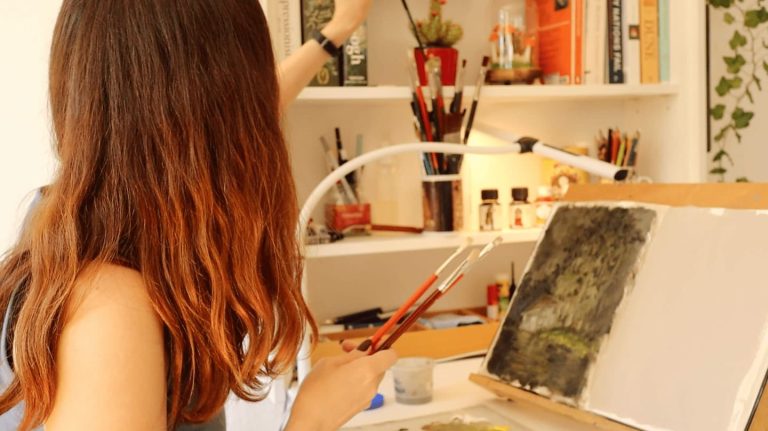
I also made a YouTube video that shows the entire process and serves as a companion for this article, so feel free to check it out:
Tools and Materials
Here are the materials you’ll need to create your canvas. Depending on your preferences and the type of canvas you’re making, some items may vary, and later I’ll go over the differences between some of the options:
Essentials:
- Stretcher bars (4 pieces)
- Canvas material (raw linen, cotton, or pre-primed canvas)
- Staple gun and staples
- Staple remover
- Size (e.g. rabbit skin glue, gelatine, PVA or an acrylic polymer)
- Gesso
Optional:
- Stretcher pliers
- Hammer (to secure stretcher bar joints and drive the staples in)
- Double-boiler setup (for rabbit skin glue preparation)
- Acrylic paint for tinting the canvas
- Canvas keys (for tightening the canvas)
Assembling the Stretcher Frame
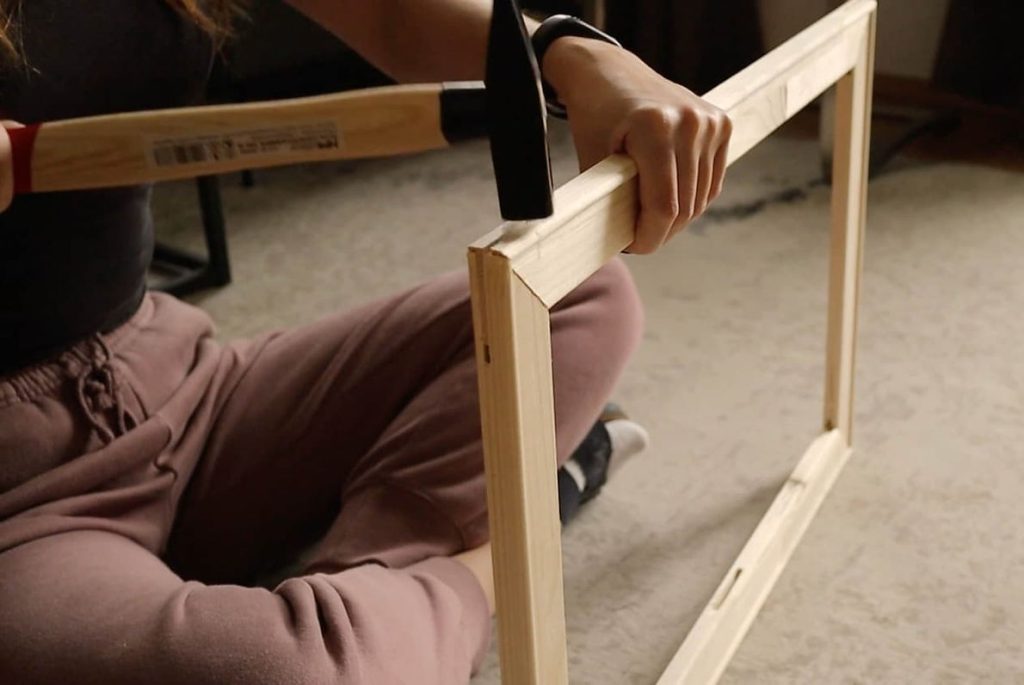
Your canvas begins with a sturdy stretcher frame made out of two pairs of stretcher bars of the same length (e.g. two 40 cm long bars and two 60 cm long bars for a 40 x 60 cm canvas). Stretcher bars come in various lengths, allowing you to customise your canvas, and can be purchased at most art supply stores. Here’s how to assemble your stretcher frame:
Connect the stretcher bars at the corners, ensuring the beveled edges (i.e. the “bumps”on one side of the bars) face upward – that’s the side you’re going to stretch your canvas on later. The beveled edge minimises the contact between the canvas and the wood, which helps prevent so-called stretcher marks and ensures the longevity of the painting. You can use a hammer to gently tap the joints together if they feel loose. Make sure that the corners of the frame are perfectly square: you can use a carpenter’s square or measure the diagonals of your frame and adjust it if necessary.
Stretching the Canvas
Prep: Choosing Your Canvas Material
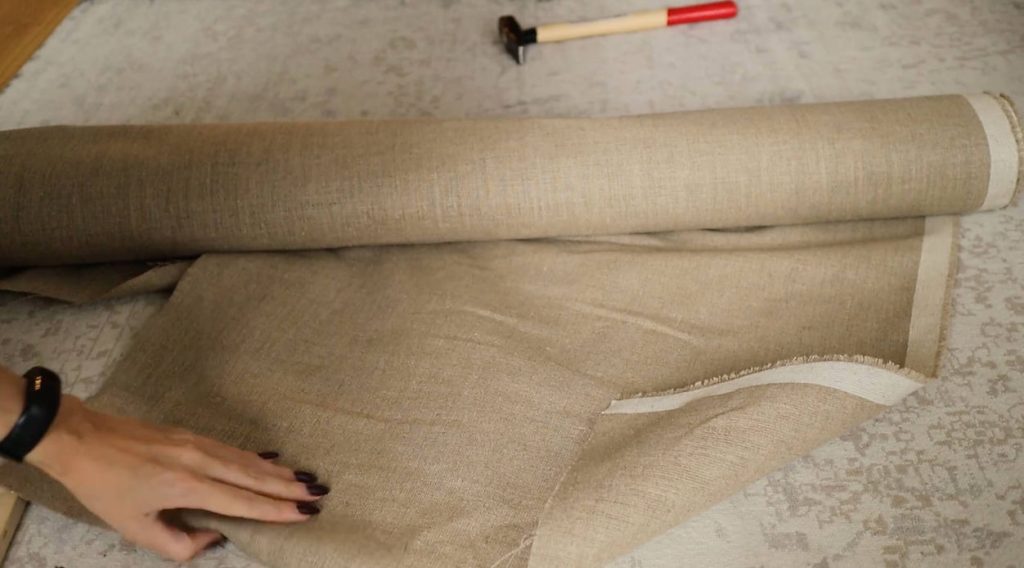
Canvas usually comes in large rolls that resemble rolled carpets. They’re typically 10 m long, so one canvas roll is an investment that can last you many paintings. There are two main fibre types used for making canvas:
- Cotton canvas is affordable and widely used, especially among beginner painters. It’s easier to stretch and still offers good quality when properly prepared. However, it’s not as durable as linen and hasn’t been time-tested like linen
- Linen canvas is strong and ideal for professional-quality paintings. It offers excellent archival qualities and was used by the old masters for centuries. Linen is tougher than cotton and is hence harder to stretch.
Canvas comes in raw and pre-primed format. Pre-primed canvas can save you some time as it doesn’t require sizing or priming. However, it’s slightly harder to stretch evenly, especially if you don’t have the right tools and setup required for it.
How to Stretch Your Canvas
Stretching your canvas is a critical step which makes sure that you have a tight and stable surface for your painting later. It might take some practice, especially if you don’t have much physical strength (like me), but you can get the hang of it with time. I’ll also show you a trick you can use to create a clean-looking canvas stapled to the back of the stretcher frame.
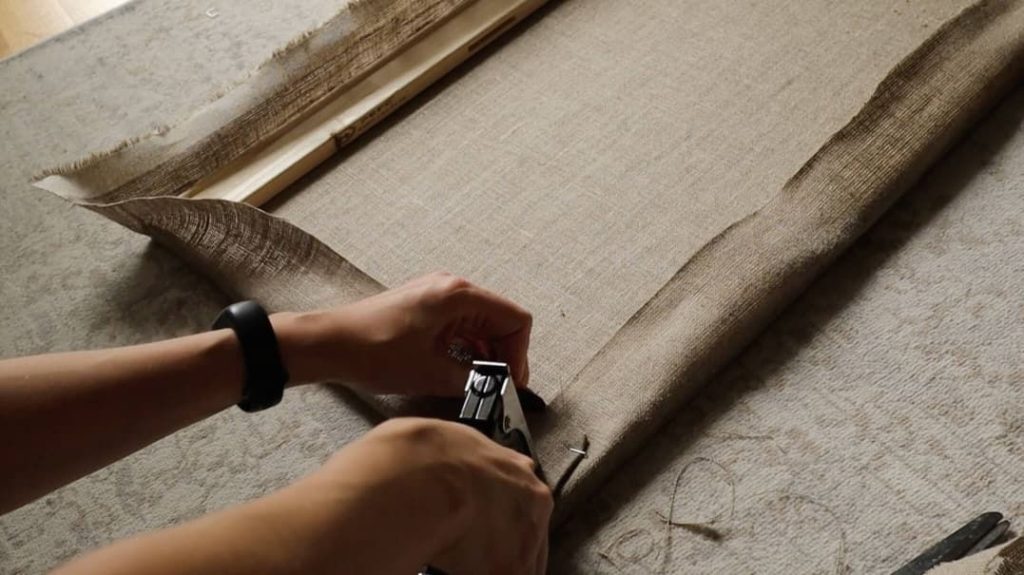
- Step 1: Cut the canvas to the size of your stretcher frame, leaving an extra 5-8 cm on each side. This will allow you to wrap your canvas around the stretcher frame and provide enough room for stapling.

- Step 2: Staple the canvas to the centre of one side of the frame. Then move to the opposite side, pulling the canvas tightly before stapling. Stretcher pliers will help you pull the canvas firmly. Repeat this process for the remaining two sides. Stapling in this crisscross pattern helps distribute tension evenly across the canvas.
- Step 3: Put in two staples around the first staple on each side, then repeat the process for the opposite side. Do the same for the remaining two sides. Continue stapling outward from the centre of each side toward the corners, rotating the canvas upside down as you go.
- Step 4: When you reach the corners, fold the excess canvas on the back of the corners and secure it with staples for a clean finish.
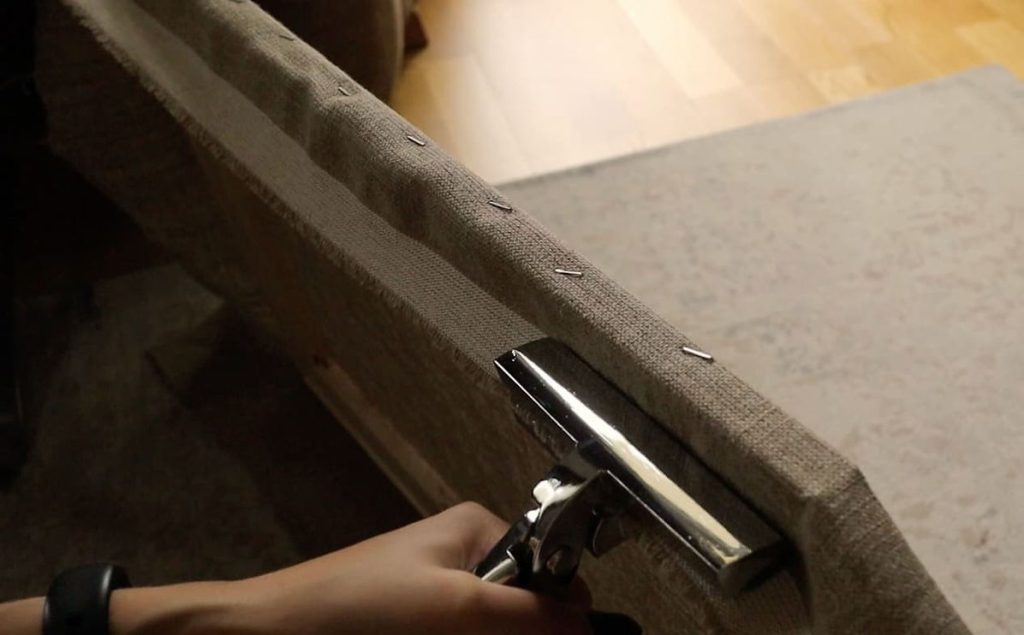
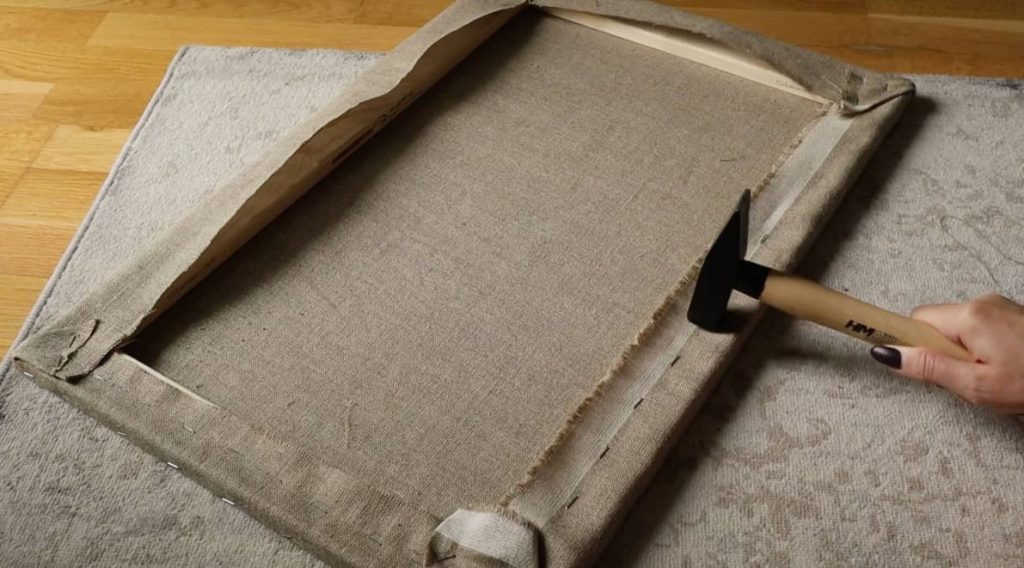
- Optional – Step 5: Now, if you, like me, prefer to have the edges of your canvas clean and free of staples, you might want to staple your canvas to the back of the stretcher frame. Doing so right away requires more physical strength and a different setup from from I got, so I normally first staple the canvas to the edges, and then to the back of the frame, after which I simple remove the staples from the edges of the canvas.
Sizing the Canvas
Raw canvas has to be sized to prepare the fabric for painting by sealing its fibers. Sizing is a protective layer of sizing liquid or paste that creates a barrier between the paint and the fabric, preventing the oil paint from seeping into and deteriorating the canvas.
Without proper sizing, oil paint can penetrate the canvas, causing long-term damage to the fabric and the painting sitting on top of it. If you’re using a pre-primed canvas, you can skip this step entirely, as pre-primed canvas has already been sized and primed. However, for raw linen or cotton, sizing is required to protect your work for years to come.
Choosing Your Size
There are many options when it comes to sizing methods, each with their pros and cons. Here are some of them:
- Rabbit Skin Glue (RSG) is a traditional sizing material made from collagen extracted from animal skins (which are not necessarily rabbits). It has been used for centuries by artists, and its main advantage is that it helps tighten the canvas thanks to its hydroscopic qualities. As the glue dries, it shrinks, creating tension in the canvas material. However, this property also means RSG can re-absorb atmospheric moisture and become brittle over time, especially in fluctuating humidity, which may cause cracking in the paint layer, so you should avoid overusing it and overtightening your canvas.
- PVA size, a modern alternative to RSG, is flexible and easy to use. Unlike RSG, it doesn’t tighten the canvas but still provides a protective barrier. Its flexibility makes it less prone to cracking and a more forgiving choice for artists working in climates with fluctuating humidity levels.
- Acrylic polymer size is another contemporary option. It combines the benefits of flexibility and excellent archival quality. Like PVA, it doesn’t tighten the canvas but creates a durable, non-absorbent surface that’s ideal for both oil and acrylic paints.
- Gelatine is quite similar to RSG in its composition and application. It is also collagen-based and provides a slight tightening effect, even though it’s less pronounced than RSG. Gelatine is easier to prepare and apply than RSG, as it simply dissolves in warm water and doesn’t require as much care in heating. It is a good option for artists who want the benefits of traditional collagen-based sizing without the challenges of working with RSG.
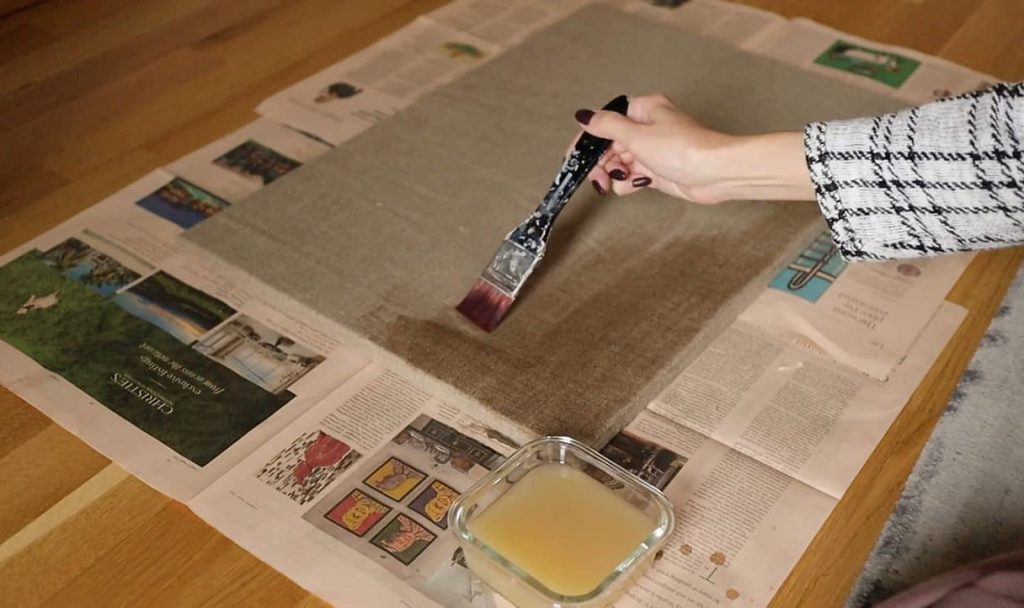
Sizing Your Canvas with Rabbit Skin Glue (RSG)
I happen to have a large jar of RSG, so let’s go over this sizing method in more detail, as it requires the most precision and care in its preparation and application.
Preparation:
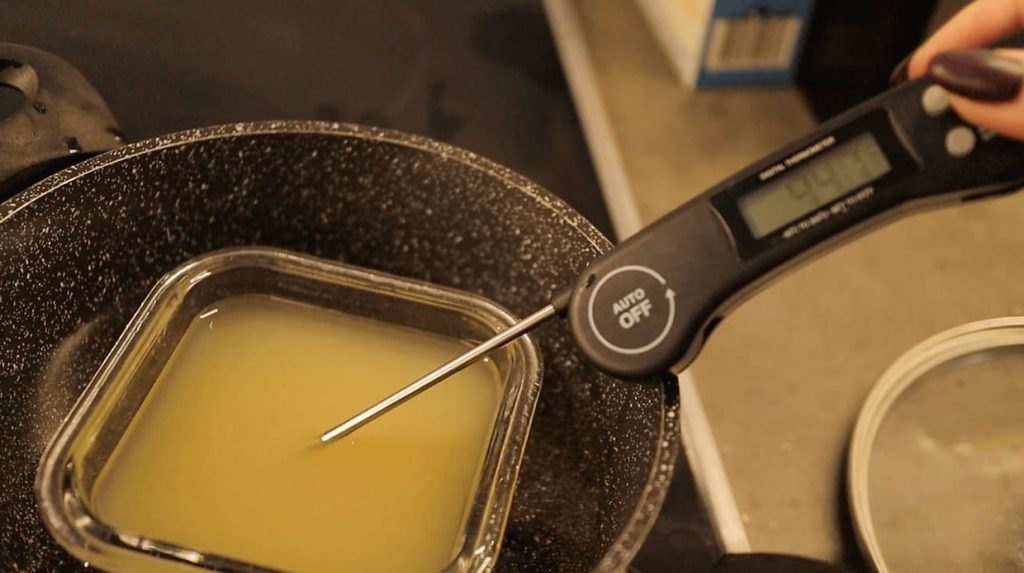
- You don’t need a lot of dry glue to size one canvas: 30-50 grams per a square meter of canvas is usually more than sufficient. You’ll need to soak the glue crystals in water (a 1:10 to 1:20 ratio of glue to water, depending on the desired consistency) for at least 3 hours, but it’s best to leave it soaking overnight. This will allow the granules to absorb water and swell, which will help the glue melt into a uniform mixture later on.
- Place the soaked glue in a double boiler. Since I don’t have one, I just put a glass container in a saucepan filled with water. Heat the mixture to around 45–60°C, stirring occasionally until the glue becomes liquid and consistent. Avoid heating it to more than 60°C – it can damage the collagen structure, rendering the glue ineffective. Boiling the glue will render it unusable, so it’s important to avoid overheating.
Application:
- Apply the RSG while it is still warm using a wide, flat brush. Use enough glue to saturate the fabric but avoid pooling it, which can lead to uneven tightening and damage your canvas. You can store the leftover glue in an airtight container in the refrigerator for up to a week.
- Allow the first layer of glue to dry completely. The canvas will become significantly tighter as the glue dries, which is one of the main advantages of using RSG.
- Hold the dried canvas to light. If there are still many holes in it, you can apply a second coat of glue for added protection. You can add a small amount of water to the glue when heating it to create a thinner mixture, which will reduce the risk of over-tightening.
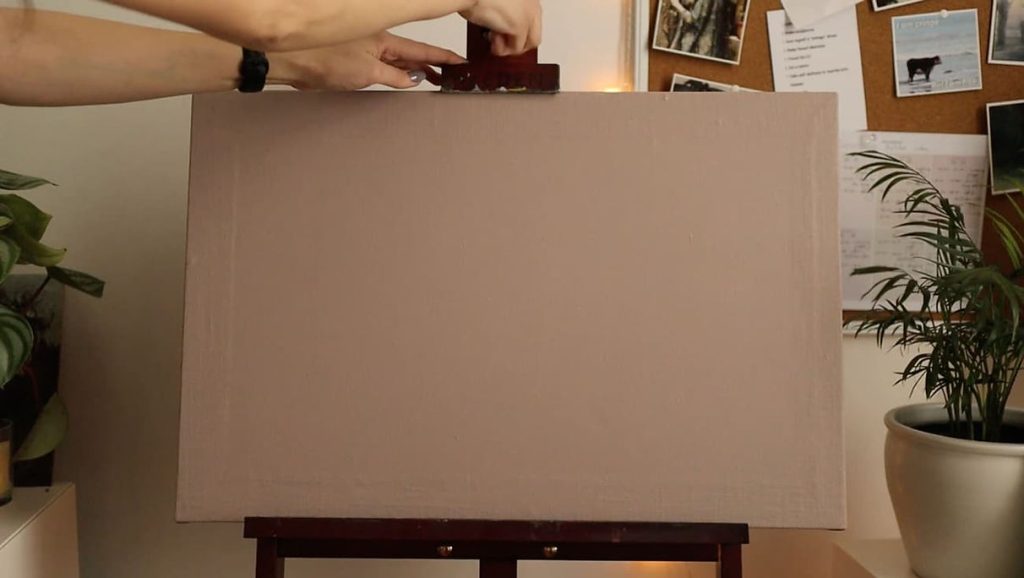
Priming the Canvas
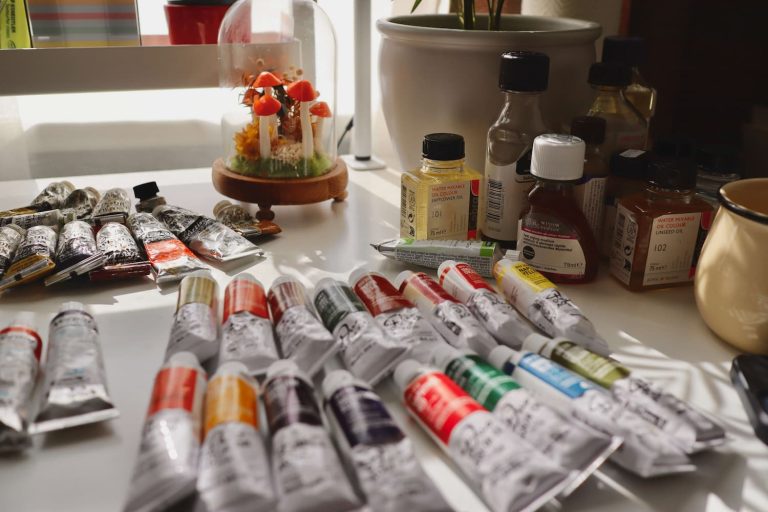
Priming refers to the application of a preparatory coating, known as a primer, to the surface of a canvas or another painting surface. When it comes to primers, the most popular options are acrylic gesso and oil-based primer. The former works for both oil and acrylic paint, while the latter can only be used for oil painting. I prefer GOLDEN Bright White Acrylic Gesso for priming my canvases.
Priming creates an additional barrier between the paint and the fabric, protecting the canvas from damage. It also reduces the absorbency of the fabric, ensuring smoother paint application, and provides a toothy surface for better paint adhesion. Most professional artists have qualms with store-bought canvases because they are typically under-primed and use cheap diluted gesso. That makes them too absorbent, which can have a negative effect on the painting process.
Let’s go over the process of priming your canvas with gesso:
- Use a brush or roller to apply the gesso in thin, even strokes. Work in one direction (vertical or horizontal brushstrokes) to avoid patchy coverage. Alternate the direction of the strokes for each layer (e.g. horizontal for the first layer, vertical for the second, etc.). Apply enough gesso to fill the weave of the canvas but not so much that it pools or drips. Keep in mind that you’ll need a lot more gesso for the first layer than for the subsequent layers.
- Allow the first layer to become dry to the touch before applying the next. Drying time varies depending on humidity and thickness, but a couple of hours is usually sufficient. Lightly sand the dried layer with fine-grit sandpaper if you prefer a smoother finish. Wipe away any dust before applying the next layer.
- You’ll need at least 2-3 layers of gesso to properly prime your canvas and fully seal the surface. Let the primed canvas cure for at least 24 hours before starting your painting.

- Optional: I prefer to tone my painting surfaces because it allows me to see the values better and lets the canvas act as a mid-tone. You can mix a small amount of acrylic paint into your final layer of gesso to create a tinted ground. I go over the benefits of toning your canvas in my article on painting landscapes.
Conclusion
Making your own canvas is an incredibly useful skill that gives you control over the materials and preparation of your painting surface. You can save a lot of money and create a high-quality canvas by following these steps. Besides, it’s a rewarding and meditative process that can deepen your connection to your craft. If you’ve never tried making your own canvas, give it a go! Let me know if you have any questions, and feel free to share your own tips in the comments below.